I know some people think I’m a bit stuck in my ways because I don’t embrace every new idea that comes along. I’m actually quite open to alternative growing methods. The fact of the matter is that I look to use methods that are practical and generally work. Proven methods tested by many gardeners over time. But that doesn’t stop me from trying out alternative ideas.
Creating a New Plot
Our side field consists of rough pasture growing on a very stony, nutrient-poor, acid soil. Improving this enough to grow vegetables is a problem. The classic ways of double digging or creating a lazy bed are hard work at best but the large amount of stones we ‘enjoy’ makes them near-impossible jobs. Just getting the spade into the ground is hard as it bounces off the stones. My Sneerboer pointed spade does help as it pushes between stones but even so, tough.
Raised beds are another answer. They do provide a good depth of soil, ideal for crops like parsnips or carrots. The downside is they cost money to buy the wood and need to be filled with decent soil and compost. There’s more on raised beds here: Raised Beds – Vegetable Growing in Raised Beds
Combining Methods from Different Disciplines
Now I’d like to create a new plot, an additional growing area, without spending on wood or importing a load of compost. I’m not sure I can make it work but I’m going to try using a combination of a technique from Regenerative Agriculture with a permaculture method and finally old fashioned (or should that be time-proven?) cultivation. There is some expense involved for the weed matting but that can be re-used afterwards so not so bad.
Regenerative Agriculture
Regenerative agriculture is basically sustainable agriculture that actually improves the land. It increases the land’s capital rather than drawing it out to produce today’s food. It’s fast ceasing to be alternative and becoming mainstream. The irony is that some of the methods were being used at least 80 years ago!
The method I’m stealing for this project is to just let the grass grow before killing it off by covering it. This means the grass has developed a larger root system which will provide humus in the soil when the grass is killed off. Usually this is used as part of a grazing system where the grass is allowed to grow long before being tight cropped.
Permaculture
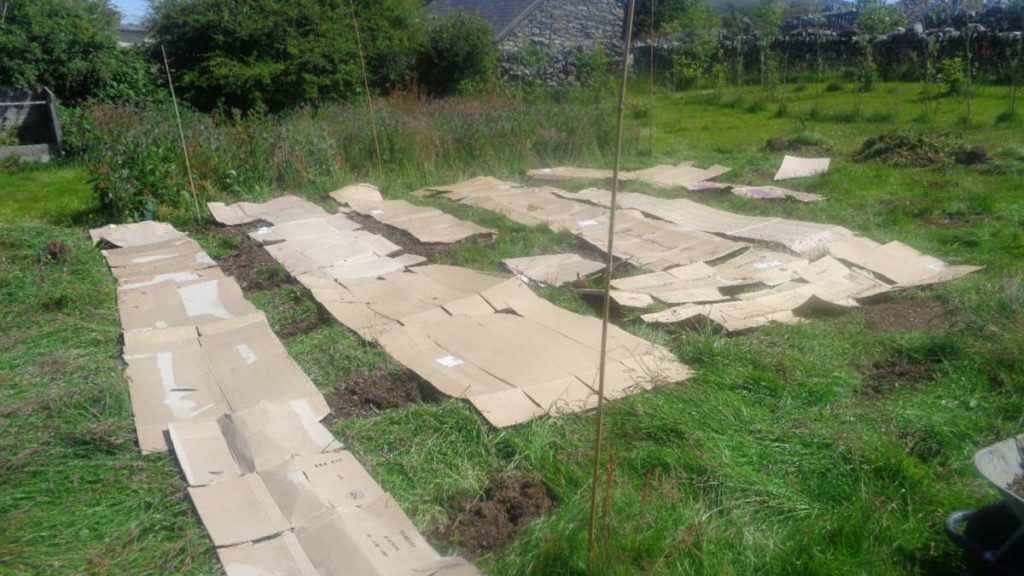
It’s a pretty standard permaculture method to cover new land with cardboard and then compostable green materials and compost. This kills off the grass and weeds below whilst adding carbon and humus to the soil.
I’ve managed to save up a lot of cardboard but not enough green materials and compost to prevent the grass growing through. Covering it with weed suppressing membrane will achieve that.
Pumpkins & Squashes
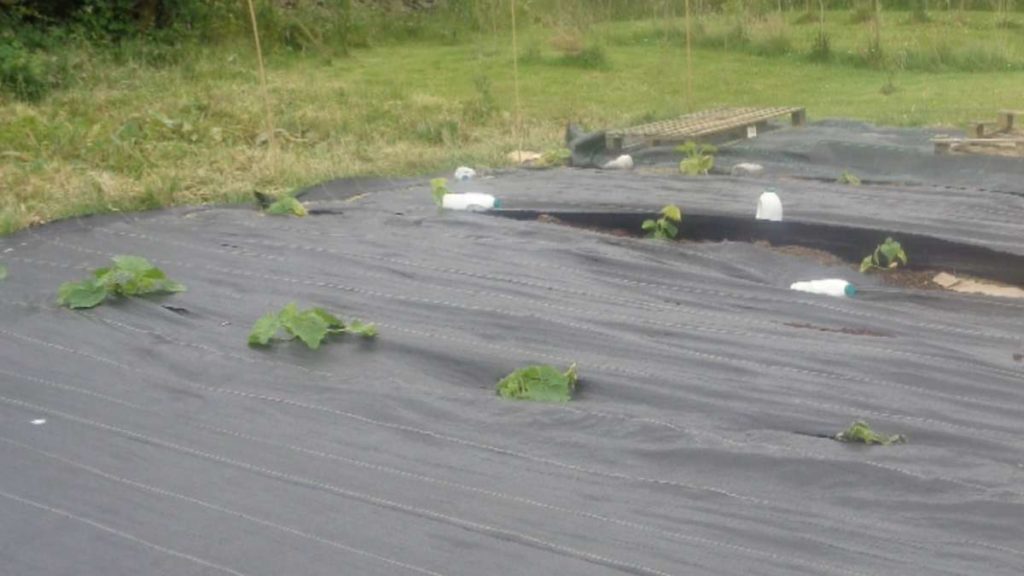
Rather than just leave the area unproductive for the season, I’m planting my pumpkins and squashes in there. Where the weed matting meets – it’s in 2 metre wide strips – holes were dug, one metre apart. The holes are rough cubes, about 30 cm wide and deep. These were then filled with compost into which the plants go.
I’m growing Jack O’Lantern Pumpkins, Hunter Butternut Squash, Crown Prince Squash and Uchiki Kuri (Oochy Koochy as we call them) Squash. Quite how many I’ll end up with is anyone’s guess but if there’s more than we can handle, I’ll give them away.
Problems!
There’s no substitute for actually doing something to find out what can go wrong. Theories are great .. until they meet reality.
Spacing
Now the theory is simple. The membrane is 2 metres wide so run a line at 2 M from the edge and dig the planting holes. Then another line 2 M from the first and a third 2 M from that.
In practice the green materials on the surface cause hillocks which means the edge isn’t 2 M but a little less. So dig the holes after laying the membrane – just fold it back when you dig.
Temperature
The day after planting was hot with strong sunshine. The black weed membrane got really hot and the plants dried out. Happily most have recovered but in hindsight I should have flood watered the night before. That’s what weather forecasts are for!
Looking Ahead
If all goes to plan, once the squash have finished the grass under the cover should be dead and the soil enriched. I’ll then take the membrane off and sow with mustard green manure. The mustard should help confuse the wireworms which are a problem for potatoes when converting grassland to production.
Then I may rotavate – although digging the rocky soil is hard the rotavator just kicks them up and I can pick them out. I’ll see how much compost I’ve available then as well and decide exactly what to do.


The membrane is plastic, surely we have more than enough of it killing our planet?
I take your point, Richard, but plastic isn’t such a bad thing. Single use plastics (packaging) are pretty dire but plastic can be a durable material.
I’m using plastic plant pots that are 20 years old! And still as usable as the day they arrived.
The real problem with plastic is the way it’s disposed of at end of life – whether that be 20 years or single use. Much is just not economic to recycle but it could be burned to generate power or heating. That’s not ideal but far better than dumping.
When I bought the membrane I went for the best quality – most durable. It’s going to have at least a 15 year life, probably much longer.
Believe it or not, I do consider my use of plastics. I bought some seed trays last year and went for the best quality, most durable I could find.
Fair points John, it wasn’t a personal criticism just making a point. 🙂
That’s how I took it, Richard 🙂
I’m chuffed to see this – this is my standard approach to breaking new ground on our used-to-be-a-scrapheap plot. Cardboard; manure/compost; membrane; pumpkins. I think the heat from the membrane also helps them ripen – they always seem to ripen first on the underside, which is counter-intuitive.
I came up with the approach in a rather haphazard way – I was just going to cover the ground for a year, then thought, “why not try pumpkins?” Yours was arrived at from a far more well-informed approach! 😀
Doesn’t really matter how so long as we get there! 🙂