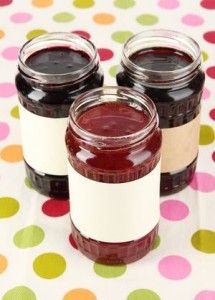
This article and the accompanying articles cover the basic method for making jams and jelly preserves. Once you understand the basic process following individual recipes becomes easier.
 The good news for someone starting out making their own jam is that you can get away with using the equipment you’re likely to have in your kitchen anyway.
It’s when you start making a lot that some specialist equipment really comes into its own.
Jam Making Method
- Wash the fruit, drain well and remove any stalks and stones.
- Weigh the fruit and put in a preserving pan with the water and acid if used.
- Place on a ring, bring to the boil and then reduce to a simmer and simmer gently until the fruit is soft.
Jelly Making Method
As above but there is no need to remove the stalks and stones.
Tip into a jelly bag and leave to strain as per the recipe but usually overnight.
Return the strained juice to the pan and re-heat.
With Both Jelly and Jams
Test for pectin content before the sugar is added to the cooked fruit
If additional pectin is needed either simmer for longer or add some pectin stock or powder to ensure the jam will set.
Warm your sugar in the oven as you sterilise your jars whilst the fruit is cooking, Add the warmed sugar and stir away from the heat until the sugar has dissolved.
Once the sugar is dissolved, bring to the boil and boil rapidly, stirring occasionally to prevent the jam sticking to the bottom of the pan and burning.
Test for Setting Point
Remove the pan from the heat and test for setting point by one of the following ways:
- Put 1 teaspoon of jam onto a cold saucer and allow to cool for a minute. Push the surface gently with your fingertip and, if the surface wrinkles, setting point is reached.
- Dip a wooden spoon into the jam, remove it, and after a second or two tilt the spoon so that the jam drips. If the jam is almost set and the drops run together in large flakes, setting point has been reached.
- Dip a sugar thermometer in hot water, stir the jam, then immerse the thermometer into it. Do not allow the bulb to touch the bottom of the pan as it may break. If the temperature is around 105°C (220°F) setting point has been reached.
Add a knob of butter or a few drops of glycerine to the jam, stir well to remove the scum.
- Pour into clean, sterilized, hot dry jars at once, filling to within ¼ inch of the top of the jar.
- Put a circle of waxed paper, waxed side down on the top of the jam or jelly
- Cover with lids or cellophane covers whilst the marmalade is still hot
- Wipe the jars clean and cover.
- Leave to cool, wipe clean of any spills and then label with contents and date.
Low Sugar Jams
You can actually make jams with lower than the usual 50 or 60% sugar content. Although I can understand people being concerned about high sugar intake in modern diets, most of that sugar tends to be in processed foods.
As a rule the proportion of sugar to fruit in low sugar jam is 1.5 to 2.0, so they still contain a fair amount of sugar. However, setting is often a problem unless there is ample pectin and acid in the final boiling and even then the set will be less firm than usual.
The jam will keep for only a few weeks unless stored in airtight jars and, once opened, will remain in good condition for only 10 to 14 days.
More in Jams, Jellies & Marmalades
- Jam and Jelly Making – Fruit, Acid, Sugar and Water
- Equipment Required for Jam and Jelly Making
- How to Make Marmalade
- Pectin – How to Test for Pectin
- Pectin for Jam, Jelly & Marmalade Making
- Making Jams in Microwave & Bread Machines etc.


