The good news for someone starting out making their own jam is that you can get away with using the equipment you’re likely to have in your kitchen anyway. It’s when you start making a lot of preserves that some specialist equipment really comes into its own.
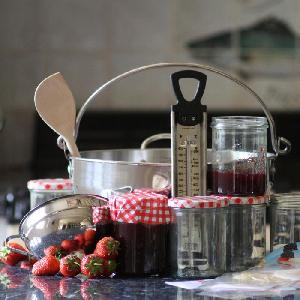
Equipment for making jams, jellies and other preserves
Methylated Spirits
One item you may not have that is a must is a little bottle of methylated spirits for testing pectin. You can pick these up from any chemist.
Sterilised Jars
You can buy new jars but we save up any jars that come into the house and ask our family and friends to save them up for us. The ideal jar will have held jam already and have the metal screw top that has a plastic coating.
Technically you can use any jar or even glazed pot so long as it isn’t chipped or cracked. You don’t actually even need a lid as one can be improvised from cellophane and an elastic band. Unlike chutneys, an air tight seal is not absolutely necessary if a waxed disc is placed on the jam before the dust cover.
The easiest way to sterilise your jars is to place them upright with the lids off along with the lids on a baking sheet in a very low oven for ten minutes or so. A good time to do this is when you warm your sugar. After you take the sugar out, close the oven door and switch it off. The residual heat will keep the jars sterile until use.
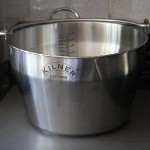
Jam / Preserving Pan
Preserving Pan
Although small quantities of jam can be made in a heavy-based saucepan or a pressure cooker without the lid, it is worth investing in a good quality thick based, stainless steel preserving pan.
A good quality pan will cost a fair bit but they do last a lifetime.
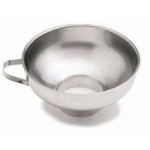
Wide Necked Funnel
Getting the hot jam into the jars can be a very messy business and a wide neck funnel will help no end when pouring extremely hot jams etc. into jars
The alternative is to use a Pyrex type measuring jug but for the few pounds these funnels cost and the mess they save, they are well worth buying.
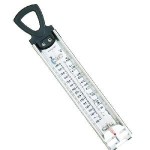
Sugar Thermometer
A sugar thermometer is useful as a guide to knowing if the setting point has been reached although we still test using a saucer as described in methods.
We managed for years without one, but once again, they only cost a couple of pounds to buy. They usually read from 10deg C to 204deg C.
Ordinary room thermometers can not be used.
Waxed Paper Circles
Immediately after the jars are filled they should be wiped clean and a waxed paper circle with the waxed side down put on the top of the jam before the lid is screwed on. The waxed paper circle should be absolutely flat on the surface of the jam to prevent mould from developing. You can get away without them if using plastic coated lids on the jars.
Labels
You need to label the jars with the contents and date. You can buy labels to write on with decorative borders or just buy a sheet of labels for use in a computer very cheaply. If you give away your jam as a gift, a nice label makes all the difference.
Stone Remover
If you make cherry jam then a stone remover will save you hours. There is nothing worse than breaking a tooth on an unexpected stone in a jar of jam.
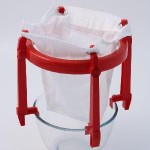
Jelly Bag
For jellies and cheeses you will need a straining bag. We picked up a strainer set which includes a frame that holds the bag above a bowl allowing you to concentrate on pouring the contents.
You can make one yourself if you’re inventive – when John’s collapsed I bought a proper one!
Other Items
The following items will probably be in your kitchen anyway:
- A long handled wooden spoon for stirring your jam
- A slotted metal spoon for removing stones and scum from jams
- A decent set of scales. It’s a recipe for disaster guessing at weight when jam making and every cook needs a good set of scales anyway.
- A metal sieve.
- A grater or a mandolin is useful for marmalade as is a zester and a peeler comes in handy as well.
- A Pyrex or similar heat resistant measuring jug is useful
A full range of jam making equipment etc can be found in the allotment shop.

