
Experimenting with making an ultra low-cost wicking pot system for tomatoes, peppers, cucumbers etc.

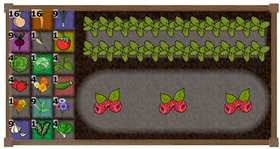
Wicking pots in seed tray reservoirs planted up
Over the years I’ve found that self-watering wicking pots very effectively provide the optimum conditions for pot-grown crops. Tomatoes, peppers, cucumbers, aubergines all do extremely well and the wicking fed salad planter in the greenhouse out performs the borders.

Strawberries in a Grow Bag on a Hozelock wicking watering base.
Wicking Grow-Bag Waterer
For those who use growbags, the Hozelock wicking grow-bag waterer gives brilliant results. Far easier than any other grow bag watering system I’ve tried in the past. Highly recommended. Available from Two Wests
For years I’ve grown in Quadgrows where the pots are fed and watered from a large reservoir below. The problem with Quadgrows and Chilligrows, which are essentially Quadgrows with 3 smaller pots and a smaller reservoir, is cost. At over £60 for a Quadgrow, it’s not cheap. Worth it over the years, I think, but a considerable chunk from the wallet.
The Mission

Making holes in the bottom of some old 8″ pots to feed the matting wick through.
So my mission (imagine the Mission Impossible theme playing in the background) was to produce a wicking pot system on the cheap. Certainly less than £15.00 per pot.
Initially I bought some plastic boxes from Ebay to be the reservoir. Drilled holes in the lid to run the wick through and to fill up with water and feed. The wick is just cut from horticultural capillary matting which can be bought cheaply in sheets.
I then drilled holes in the bottom of some pots, fed strips of capillary matting through and planted up. They certainly worked well for the plants but they were awkward and cumbersome to set up and fill.
Minimum Cost Approach Wicking Pots
Revisiting the idea this year, I decided to try a minimum cost approach. As a reservoir I’m using solid bottomed seed trays. Not a large capacity but easy to see how much is left and easy to top up.
I then took an old 8” pot and increased the size of the central drainage hole by drilling another hole to the side, creating a letterbox slot about an inch by half an inch. A strip of matting was fed through the slit which the pot sits on. This unbalanced the pot on the base so an offcut of matting was used to even things up.

Capillary Mat Wicking Inserted
So far it seems to be working well but I’ll know for sure by the end of the season when I can compare performance.


Your article is perfect timing, I was thinking of doing something like this myself. I’ve got Quadgrows in the greenhouse at the allotment, but wanted something less expensive for the conservatory at home. Your solution seems ideal and I’ll be trying it out!
My only concern is that there might be some water logging at the bottom of the pot but whether that will be a problem I’ll find out. Sometimes you just have to give it a go and see what happens 🙂
I’m so pleased you shared this. I have looked at the quadgrow system but grow too much to buy enough for all my plants. I have capillary matting on my shopping list and intended doing something similar myself but seeing your post has given me confidence to just give it a go. I stress too much about whether i am doing things right so its nice to have guidance. Thanks again.
Not all of my experiments work out as I hope but nothing ventured, nothing gained. I bought 8 metres of 53cm wide Aquamat for £23 on Ebay. Should last me a couple of years for pots, quadgrows and benches – it’s not exactly expensive 🙂
Hi there … I also have the quad grow system and have been very pleased with it. However last year like your self I have tried to make my own just for fun. So I used one of my empty chicken pellet tubs. Cut a hole in a plant pot. Put the lid on the chicken pellet tub. Cut a hole In The middle for the wick. Cut a second hole for water/feed. I used a small piece of plastic to cover the water hole. It doesn’t look pretty but it worked.
Hi John,
Very interesting article.
Would appreciate more info on your wicking fed salad planter.
Hi Ian
See my review here: Salad & Veg Planter Review
After trying many watering systems I have come up with an inexpensive method which means I can leave my tomatoes for a week or so.A 40 gallon drum feeds water into the greenhouse by a hose which is connected to a soaker hose.The tomatoes are in pots which sit on a length of capillary matting which is laid on a strip of waterproof material.The soaker hose is laid along the capillary matting next to the pots.I can control the water to the hose by means of a tap on the drum if needed.I apply feed to the pots directly but never need to water directly.
For a few years I’ve used a really simple take on self watering pots. I use the big trays meant for grow bags. Put some pieces of old hose on there maybe a few bits of old tile. That gives a reservoir for the water.
On top, place a sheet of corrugated plastic, cut to fit the whole tray with a gap on one side. Cover that with a layer of capillary matting that folds round the gap. Fill the reservoir through the gap, pop pots anywhere on the surface.
The trays are about £6, plastic sheet is cheap, the matting is the most expensive bit.
I’ve used a similar thing for the last few years made from 2 flower buckets bought for next to nothing from Morrisons, one as a reservoir with the other sat on a shelf inside holding the plant and a wick between the two. The reservoir needs filling about once a week, works ok.
Great way of using up the fatball tubs I have lying around!
I have been using a similar system for some years. I cut most of the base out of the pot I am planting up and cover the space with several layers of newspaper, and pot up as usual. I then put these onto self watering trays available in several sizes at I think a reasonable price from ‘The Greenhouse People’.
The water can become a little high by the end of the season, and algae will grow on the matting but this does not affect the plants. I have found that the capillary matting will last 2 or 3 years if sterilised between seasons
John did you over winter your strawberries in the tray?
I haven’t used mine this year, sat in the garden now home to a
Yes 🙂
Have used the Quadgrow for a few years and think they are good, but can be improved on.
This year have put 2 wicks in each pot. Last year used the solar pump with drippers, addition. This worked, but I felt it forced the toms and cucumbers a little, and did not save water as much as stated. Runner beans needed water every day. To avoid water logging, added clay pebbles used in hydroponics, not cheap but are being reused, and will be for many years. So far the results are on par or better than last year.
My mix for the pots is 50% choir, 20% worm compost, 30% pebbles.
I also use this mix in the 60cm window box troughs for the strawberries, The end holes are slotted to meet each other and matting threaded through with 3″ outside of each end. These are placed inside rockwool slab troughs which are approx 1.3 meters in length. They have bung in the end, just remove for winter, or heavy rains. The strawberries have over wintered in these for 2 years with brilliant crops, and no health problems.
This year have been using activated worm tea as the only feed, as the replacement feed can become expensive when using all season. Plus the worm tea gives a fully organic produce.
I have used a similar system to that which you and other contributors describe. In the mid 1950s my dad grew superb Ailsa Craig tomatoes using the Ring Culture method which involved a 10 inch diameter x 10″ high ring of metal with no bottom sitting on a bed of cinders . The plants were placed on the flooded cinders and the ring filled to within 1″ of the top with garden compost to encourage secondary rooting and allow feeding with a drench of sheep tea. Bone meal, dried blood and hoof and horn obtained from the local abattoir was added to the compost mix. Early hydroponics in the days before plastic pots and polly bags of shop bought compost and fertiliser. The co-op milk delivery horse made regular contributions to the compost heap in exchange for a carrot.
My adaptation of self watering uses builders buckets £1 each slatted greenhouse staging raised off the floor with bricks to allow the wicks to dangle into grow bag trays below. The buckets have 4 1″dia holes drilled equidistant through which 2 x2″ wide strips of capillary matting are carefully placed, green side up, to provide the moisture in the base of the pot. A 10″ square of thin landscape fabric is placed on top of the matting to keep the compost and roots in. Pearlite and Fish, Blood and Bone is added to the mix and the water has seaweed extract added. I had just completed my final setting out of tomatoes, delayed due to prolonged cold spell, when I read about your experiment so I took note of water consumption and after a week of watering from the top to get the system started the 18 litre tray was empty in 10 days for 4 plants so the system is working very well. I have used this system for years it’s tried and tested and gives terrific yields and costs very little.
Hope these details help your readers become confident in using this inexpensive system where the plant drinks what it needs when it needs to so no over or under watering, healthier plants, higher yields and lower costs, what’s not to like, Enjoy.
John Kirk.
Thank you for sharing a very interesting article like this. I will keep this in mind. Keep sharing more like this
Hi, I hope this topic is still active. I was wondering if I can simply lay some wicking cord in the pot plant and have the pot on legs (coffee jar lids) on the pot plant tray and leave the wicking cord in the tray and water the (not a deep tray) often? It would be to keep Winter green soil moist.
Can’t see why it wouldn’t work, Elaine. Give it a go!
Hello
I’m reading this with interest. This year I invested in airpots for tomatoes, cucumbers,chillies and peppers in the greenhouse. I’ve also added a drip watering system. The pots sit on saucers and the drippers in the soil at the top. For the cucumbers and tomatoes I added a wick of capillary matting. I had no idea how wide or long this should be. The issue I have is that the saucers fill up and sometimes overflow a little. They have started to smell and I’ve had to empty them and also reduce the drip amount.
I’m wondering if it would be better to drip directly into the saucers? I just find this a bit scary as last year in the heatwave the tomatoes got too dry (in grow bags hand watered) and ended up with blossom end rot. So I don’t want this to happen again.
Will bottom watering be sufficient with no watering of the soil from the top. Is there a guide to the wick width and length? I’d say mine are about 6-8cm wide under the pot and to get them through the holes in the bottom of the pot I cut the pot end into 4 strands. The wick probably goes about 2/3 to 3/4 up inside the pot.
I didn’t use a wick in the chillies and peppers. Do you think this would also work for them or would it be too much water? Using the same process? Any ideas how to retrofit to pots for this season?
For feeding would I still apply from the top? Or again in the saucer?
Any suggestions great fully received.
Thanks
Hi Mark
Generally the experiment worked but the water in the seed trays became green and smelly. So not a real success. The plan is to create a one where the water reservoir is in a lightproof box. The wick is 5cm wide capillary matting from base to top of pot. No watering from the top should be necessary although the top of the soil will be dry in hot conditions, below will be damp. Feed in the water – fertigation.
Send me your email & l will send you a picture of the best wicking system for growing tomatoes that l have been using for years. Has produced over 60 tomatoes per plant.
The roots of My tomatoes in quadgrow grow into the reservoir so this becomes hydroponic growing. Because the plant has unlimited water the fruits are without flavour. Next year I’m thinking of putting a barrier of very fine horticultural fleece in the bottom of the quadgrow pots to stop the roots escaping. The quadgrow system makes growing easier but the resulting fruits aren’t worth eating. Anyone had a different experience? I grow cherry tomatoes.
I’ve grown in quadgrows for years and my tomatoes taste good. Whether the roots are in the solution or not won’t make any difference as the plants are absorbing the same nutrients.
I was advised by several old gardeners (and ive seen the same advice given on growing sites recently, to people complaining about lack of flavour in their tomatoes) to reduce watering when the fruits are ripening. The reason given for this is that it stops the flavour being diluted. I’ve grown hydroponically, both Kratky and pump system, and the result was juicy but bland fruits, which tends to confirm the advice. The toms grown in compost in pots in the same season were delicious. suppose it depends on what the grower looks for in his/her fruits. However, this is only my second season with the quadgrow and Nutrigrow so I’ll know in a few weeks if there is an improvement in the flavour.
Watch out for blossom end rot if your watering regime is restricted.
I only restrict water/feed when the fruit starts to ripen – after the blossom has dropped. Is it still possible to get blossom end rot at this juncture? But I will keep an eagle eye for it.
Hi Slim – I’m not 100% but as I understand it, irregular watering throws out the calcium transmission in the plant. Apparently calcium isn’t very mobile which is why it’s sensitive to water availability.
The most problematic time is 16 to 21 days after the flower has pollinated. At this point the tomato fruit has started to form. This is why you can have one truss affected by blossom end rot and another clear of the problem.
If you are sure your tomatoes don’t taste as good when grown hydroponically then you could add comfrey tea along with your calcium. It stinks like muck so chock full of organic compounds. If you look at this page on comfrey, I quote the NPK levels.
More on Blossom End Rot