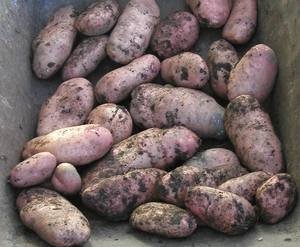
Potatoes are such an important staple food that I feel the techniques and finer points of harvesting them deserves addressing. It’s also a subject on which I’m frequently questioned so I take it people want to know.

All this from 1 seed potato! (var. Sarpo Mira)
Harvesting Potatoes
First Early Potatoes
Your first early potatoes should be ready to start harvesting from 10 to 12 weeks after planting. A good sign that there are tubers ready is that plants flower. Potato flowers can range from small and hardly noticeable to bright coloured and striking. Initially don’t expect too heavy a yield, you might not get more than a good meal from the first plant harvested. Just leave the rest of the plants to develop, it’s worth sacrificing a few plants early to get the delicious new potatoes.
Once past 12 weeks you should be looking at just over half a kilogram per plant. Some potatoes grown as earlies will just carry on bulking if left, Orla and International Kidney (Jersey Royals) being examples of potatoes grown as early varieties that are actually maincrops
Second Early & Maincrop Potatoes
The second early varieties like the salad potato Charlotte will take a week or two longer and the main croppers like Desiree and King Edward will be at least another month. Maincrops take between 20 and 26 weeks to reach their potential yield.If you’re not certain when you planted or if the crop is ready, dig up one or two plants and see. If there are still lots of tiny potatoes on the roots then leave a fortnight or so before seeing what things are like.
With the early crops you want to get them out of the ground as soon as you can to free up the space which there is just time to get some benefit from. I like to follow potatoes on with leeks or a green manure mustard. Leaving them in the ground once developed has no benefits and increases the risk of slug or other damage.
Harvesting Main Crops
With the main crops which are bred to be stored, the haulm should be cut off a week or preferably two weeks prior to harvesting which encourages the protective skin to ‘set’.
Leaving in the soil beyond two weeks has no benefit and just increases the risk of blight, slug or frost damage.
Wait for a nice bright but at least dry day to harvest on. This allows you to dry out the potatoes before storing them.
Approach from the side and carefully insert the fork, levering up to expose the tubers. Spread the crop on some dry ground for a few hours to set the skin and dry them. This will help them store better.
If they are coming up dirty rinse them in a bucket of water before hardening. You don’t want them fully washed, just get the thick off.
Harvesting Blight Affected Potatoes
The 3 week gap is to reduce the chance of any blight spores landing on the tubers and causing blight in storage.
In really bad blight years, wash each tuber in a bucket but add a couple of drops of washing up liquid. The idea is to wash off any disease spores before storing. It’s not foolproof but it does reduce in-store blight.
Ensure you get even tiny potatoes out of the ground when harvesting or next year they’ll be growing and they will act as a reservoir for pests and disease.
More on Harvesting & Storing Your Crops
- How & Where to Store your Produce
- Harvesting & Storing Onions, Garlic & Shallots
- Storing root crops, cabbages & cauliflowers, marrows & squash
- Storing Potatoes Guide


