There are all sorts of methods of producing charcoal for biochar. Many involve constructing ovens that will heat wood to seriously high temperatures – like 500ºC – in the absence of oxygen. This is known as pyrolysis.
These usually involve welding gear, old oil drums and forced draft flues but for the ordinary gardener these simple methods are less demanding – but effective.

Cone Pit Biochar Production – Redgarden Video
Making Biochar Charcoal in a Garden.
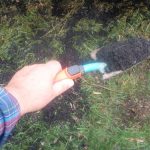
You can make biochar at home on a micro scale by digging a trench or hole and putting a mixture of dry wood and dried plant materials such as sweetcorn stalks or perennial weeds and roots into it.
Set fire to the material which will initially give off clouds of white smoke. This is mainly water vapour and not as bad as it looks. The smoke will then turn yellow as the resins in the wood and sugars in leafy material burn followed by grey smoke.
When the smoke turns grey, cover with turfs or soil leaving just a small hole for an air supply. This restricts the oxygen flow and the material will become charcoal rather than just ash. As with “proper” charcoal production some skill and judgement is required.
Once it has become charcoal, wet down with a hose to put the fire out and further crack the charcoal creating micro-pores with the thermal shock. Remove the covering and dig out the charcoal.
This will then need to be crushed (see below) and then charged as covered here: LINK
Warning – there is a fair amount of smoke generated which may result in annoyed neighbours and possibly contravene bylaws on bonfires. It’s not a particularly efficient method and generates pollution. But it is possible on the smallest scale to make charcoal.
Cone Pit Production of Biochar
This is a far more efficient method of making a fair amount of biochar charcoal in one day. It is far less polluting as it burns off the impurities and once going well produces very little if any smoke.
Important Safety Note
This creates a seriously hot fire. Do not leave it unaccompanied and keep children well away. Site well away from buildings, sheds, fences, hedges and trees – I’d suggest a 5 metre minimum. It will damage nearby plants and is best constructed on bare ground.
Keep a supply of water immediately available in case things get out of control. Buckets of water or best still a mains-fed hosepipe.
The cone pit is free, simple to make and very effective. It works well as the fire is at the top of the burn and the shape of the cone causes the flames to rise from the sides. This deprives the lower areas and centre of oxygen creating the right conditions for pyrolysis. It gets very hot so turning the tars and oils into gas which is burnt off above the wood.
How to Make Biochar in a Cone Pit
Start by digging a cone shaped pit. The size is variable, but I’d suggest no bigger than a metre in diameter at the top or it will get too hot and need too much wood to keep fed. 60 cm is a reasonable size for a first burn.
Get a pile of wood together, cut into convenient lengths around 30 cm is best. Keep this back from the pit as you don’t want it catching fire prematurely! Brash wood is ideal for making biochar.
The Burn
Start by building a small fire in the base of the cone, using dry twigs. Once this is going well begin adding some more twigs and then larger pieces of wood. Let these burn until they start turn white.
Then add another layer of wood. Once again wait until this turns black and starts to develop a layer of white ash. Keep repeating until you reach the top of the cone or run out of wood.
Allow the top layer to burn until it too develops the white ash coating on the black sticks.
Now quench the fire by adding water. It will take more water than you might imagine, keep pouring it on until the pit is full or you’re certain the fire is totally extinguished. You can check by moving the top layers with a metal spade. The base should be cool. Do be very careful.
After the Burn
Remove the charcoal and break it up into small pieces. You can bag the charcoal and trample it or hit with a lump hammer. Or place into a strong large bucket or trug and pound it with a piece of wood. The finished product should pass through a garden soil sieve.
You’re now ready to charge your biochar prior to using.
This excellent video from Redgardens in Ireland shows the process and provides further information on biochar making.
Further Information on Biochar
Charging (Activating) Biochar