Raised beds can be purely practical or they be architectural features in a garden. In this article I cover how to construct raised beds for maximum vegetable growing productivity

Size of Raised Deep Bed and Paths
Width of Raised Beds
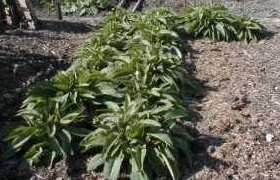
The main point of raised beds is that you never tread on them and compact the soil so it is important that you can easily reach into the centre from the side of the bed. The best width will be around 1.2M (4 feet) to allow that.
Much wider and you will not be able to easily reach the centre of the bed. Much narrower and the proportion of land given over to paths instead of growing increases, reducing overall productivity of the plot.
Length of Raised Beds
If the bed is too long, then getting to the other side will involve a long walk and you will be tempted to step over the bed so about 3M (10 feet) long is considered maximum length.
Depth of Raised Beds
A raised bed can be quite shallow but I would suggest 15cm (6″) as a minimum and 20cm (8″) as better. My own are 30cm (12″) deep and built so as to be able to add another 15cm (6″) board in the future as more and more compost is added.
I have seen raised beds that were 90cm (3′) high – ideal for those who find bending difficult or those in wheelchairs.
Paths Between Raised Beds
The main paths will need to be between 60cm (2 feet) and 75cm (2’6″) to allow easy access with a wheel barrow with the secondary paths at least 45cm (18″) wide to allow walking and kneeling as you lean over the bed.
Constructing the Raised Bed
First plan out where the beds are going and use some line to mark out. Don’t be tempted to squeeze the paths, you will regret it. Better to have a narrow bed because you will not be able to get to the bed with too narrow a path.

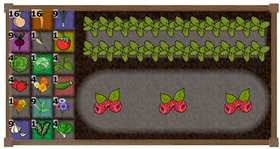
Deep raised beds with primary and secondary paths
Having marked out and checked you are happy with the layout you can produce a cutting list for the wood for the sides. One good source can be second hand scaffolding planks if they are in reasonable condition. Do not use wood that is too thin, like floorboards, because it will rot and be too flimsy.
225mm x 38mm (8.8″ x 1.5″ approx) boards are near perfect. Fix to stout internal corner posts, fence posts can be ideal, with non-rusting screws. Because the wood is in touch with the ground it will be prone to rot so paint with a preservative like Cuprinol, soak the corner posts, for a long life. The corner posts can be sunk a few inches into the ground to improve stability.
I used 3″ square fencing posts for the corners and 2×1 battens to stop the sides bowing under the weight of the growing medium. The posts are internal to the corner so the boards are screwed into the post as nails may pull through in years to come.
One good idea is to have a finial decorative ball fixed on the top of the corners, like they use for the main posts on stairs. Not only do they look really well but they help when you pull a hosepipe through to a bed, stopping it from dragging across the plants.

My first two raised beds on the new plot
Now, and this is important, before you put the wooden frame into position you need to double dig the bed removing and perennial weed roots and incorporating lots of organic matter like compost or manure into the base of the trench. Break the soil up well as you do this.
Now position and level the base using a spirit level. Allow the soil to settle for a few days and then incorporate compost into the top bringing the soil level up to about an inch or 25mm below the top of the boards. Your raised deep bed is now ready to plant.
Some people may prefer to buy raised beds for vegetable growing as kits rather than create them from scratch.
Paths Between the Raised Beds.
Once the beds are in place it is time to complete the paths between them. Level them out and compact them if loose. A shuffle walk up and down can do this. The easiest thing to do is to buy some porous weed suppressant fabric material. Cut to size and lay over the paths and then cover with bark or wood chippings.
I have seen paths made from concrete slabs, if you use these check the sizing accurately when you position the beds and save yourself a lot of work later. Other materials you can use are decking boards, gravel and even block paving bricks.
My Own Feelings on Raised Beds on an Allotment.
Growing as I did on heavy clay, I think raised beds can offer a great way to grow but the expense in both time and money is considerable.If you have a good, well-cultivated soil then raised beds offer little or no advantage overall compared to convention cultivation.
Also I don’t think they are ideal for crops like potatoes, Jerusalem or globe artichokes and sweetcorn. Neither do I think they offer any significant advantage for growing broad or runner beans. They are brilliant for root crops like carrots, salsify and parsnips because they offer deep fine soil. They also work well for a salad bed, turnips and beetroot.
I wouldn’t turn an entire allotment over to raised beds but I certainly would have some on the plot
For a list of benefits and drawbacks of raised beds see part one of this article: Vegetable Growing in Raised Beds
Further Information on Raised Beds
- Setting Up Raised Beds
- Building a Raised Bed Using Link-a-bord
- Building the Wooden Raised Beds
- More Raised Beds