
I’d got one more linkabord kit raised bed so I thought I’d set that up and photograph it as I went along with a view to an article. Now, even with our tough pasture and stony ground, this shouldn’t have taken more than an hour. It actually took 3 thanks to a huge rock!
Cutting the rods took a couple of minutes with a hacksaw. Once inserted, a cap is pushed into a hole in the centre of the rod that stops it from sliding out. Well that’s the theory but I had one forced out when I was levelling the bed up. No big fault.
So, lay the assembled bed onto the grass and go around the outside with a lawn edging tool, the half moon type. I found this far easier to use to cut into the grass than my spade.
I also used the lawn edger to cut internal lines and then was able to take off the turf in strips. These are being stacked up, face down and will be covered in a plastic sheet. By next year they should have rotted down into good loam.
The next thing is to dig over the bed. The raised bed is about six inches deep but digging over will increase the depth of topsoil available to the plants. One of the benefits of raised beds is that they make use of depth to enable closer planting and growing more in a given space.
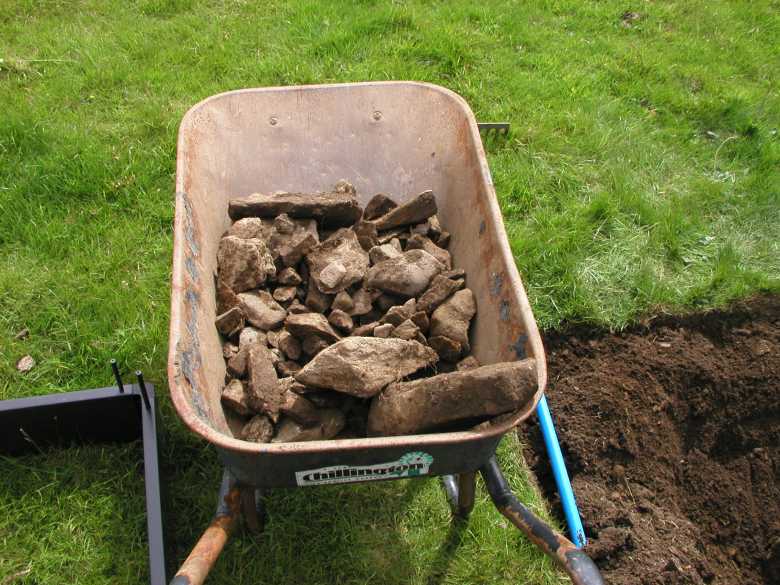
I’ve moaned before, well nearly every entry, about the stony soil and as part of the digging over, I remove the larger stones. This patch excelled itself! Some of the rocks were almost too big to lift one handed. You can see how many came out from the bed in the wheelbarrow.
The thing that really took the time was the big rock in the middle of the bed. It had to come out as it would have been in the way for cultivating. It doesn’t look much in the photo, but it was like an iceberg, two thirds below the surface. In total it was two feet long and I could hardly lift it. So two hours later, the rock was out.
Into the deep hole where the rock had been I put some turf upside down, you can’t have too great a depth of topsoil. I then added a bag of soil conditioner, made from rotted bark and horse manure, and fork mixed it into the soil.
Ideally, you should use home made compost and plenty of it but I haven’t got any yet. What we’re trying to get is a good depth of fluffy, rich soil with plenty of organic matter. It doesn’t matter if your soil is clay or sand, organic matter will improve it. The soil will drain well but also hold water like a sponge.
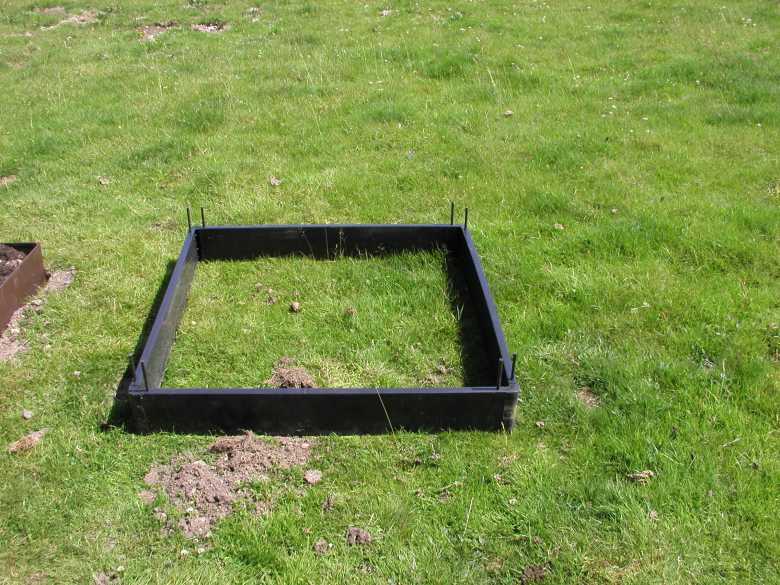
Next I positioned the bed onto the dug over, compost-added soil. To make sure it’s square you measure across the diagonals, if they are equal then the bed is square. I used a spirit level to roughly level the bed. The plastic rods protruded a few inches below and will keep it in position.
Finally the bed was filled with a couple of bags of multi-purpose compost. Now I suppose I could get away with planting it up immediately but I prefer to leave it for a couple of weeks if possible to settle. A few good downpours or a soaking with the hose will force the compost down into the holes between the soil below.
I’ve never been a great fan of raised beds, often they’re set up on good deep topsoil where they serve little purpose except for the psychological benefit of making a plot easier to manage. But, in this situation where the soil is thin and stony, they are the fastest way to achieve some quality growing space.
-
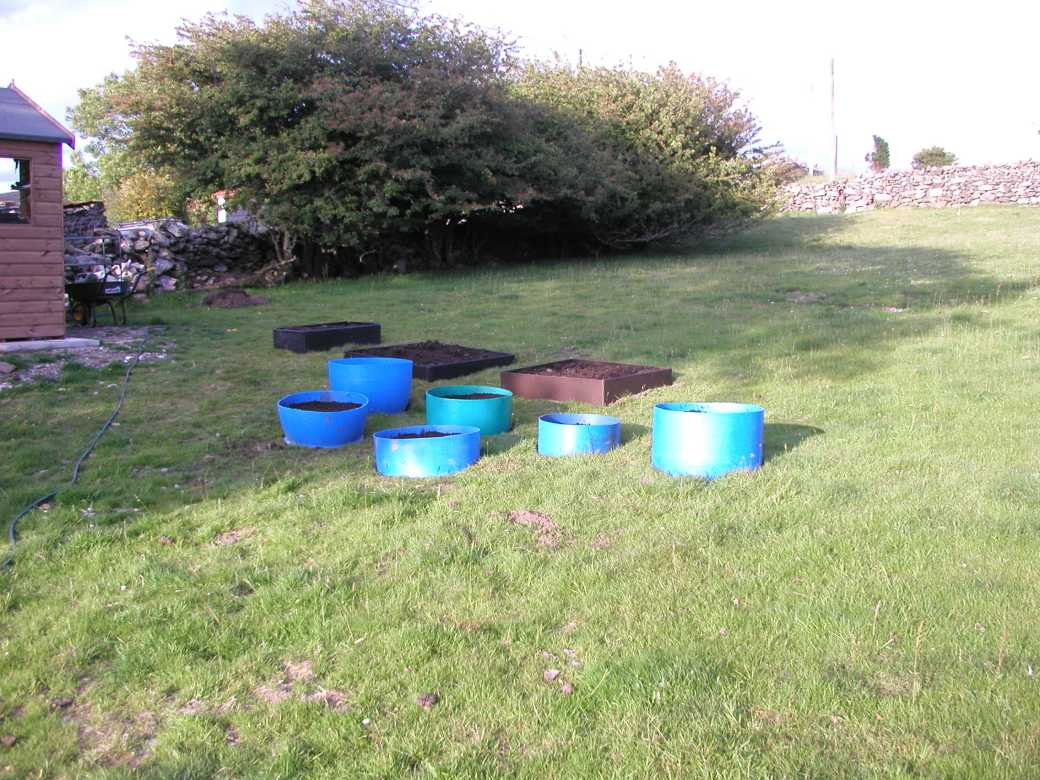
- Carrot barrels and raised beds
-
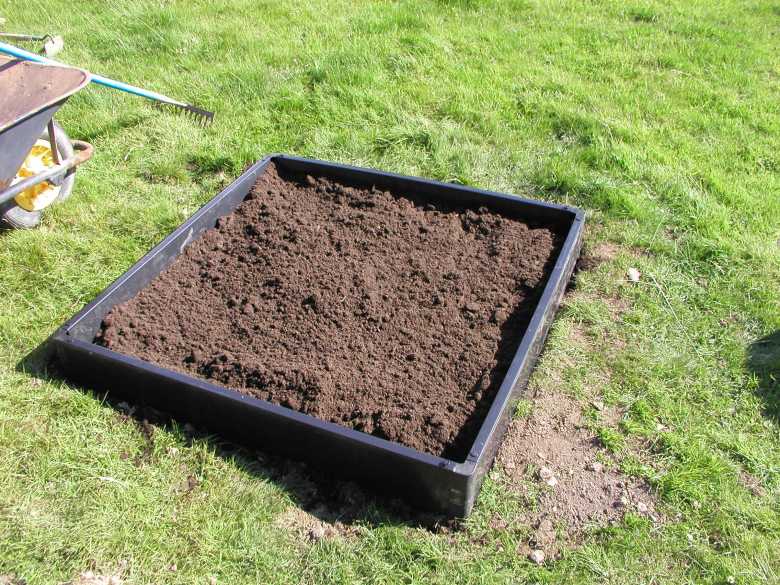
- raised bed finished
-
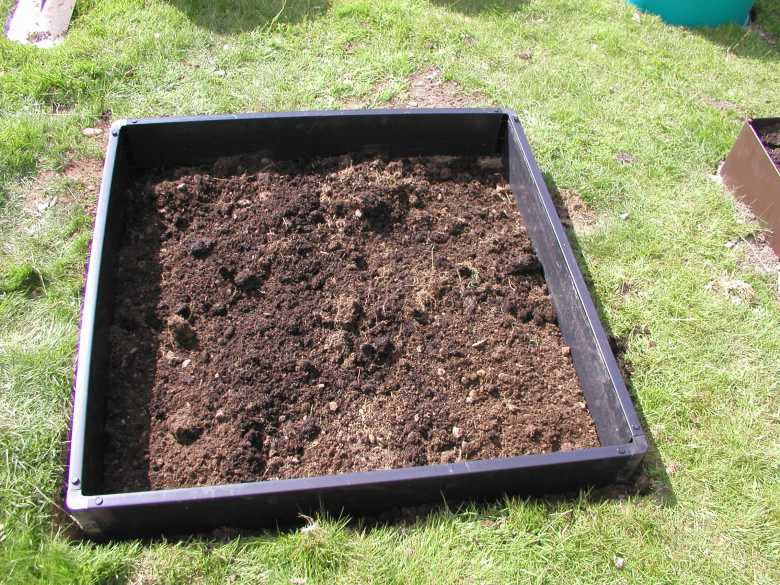
- dug over raised bed
-
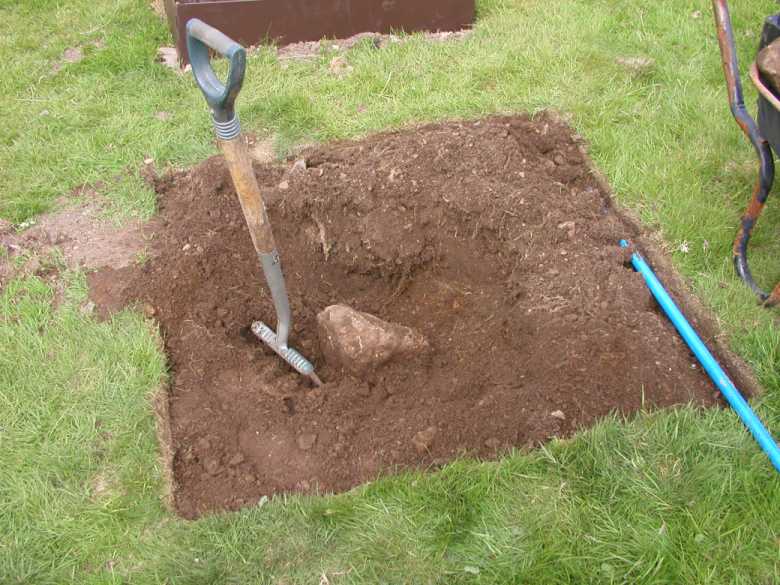
- Tip of the Iceberg
-
- stones removed from raised bed
-

- turf stripped from raised bed
-
- Position the bed and cut around the edges

Heavens!
We have flinty soil which I curse every year, but I think I shall refrain now and thank my stars that I don’t have to deal with 2ft long rocks!
Keep up the good work John!
Cathy
Our soil in NE Wales is similar to yours John so I employed a much younger friend to dig out the site of a raised bed on a turf covered site. I left it for a few weeks and then positioned my planks and dug it over again. I was horrified to find 5 house bricks and the remains of an iron framed green house which I had to remove with a hack saw. In addition the ground was full of broken glass. If you want a job doing well do it yourself eh?
Apart from doing it well, doing it yourself does give you some exercise! Must admit to a great deal of satisfaction when I got that rock out.