Home Grown Mushrooms
Home growing of mushrooms was not unusual in the inter-war years. During WW2 most gardeners used their time to grow basic food crops but after WW2 home mushroom growing enjoyed a resurgence. The traditional stable manure was, of course, organic.
Value of Mushrooms
One of the reasons for this interest in growing mushrooms was that they had attracted a premium price for many years. Mushroom farming on a small scale was profitable and after WW1 many demobbed soldiers looked for occupations that were not stressful. Mushroom farming, market gardening and smallholding were prime occupations for them.
We remember mushrooms being priced at £1.00 per pound in the late 1970s, £2.20 per kilo. That’s a 1970s pound, of course. According to the Bank of England that 1970s pound is equivalent to around £5.00 in 2024 money.
According to the Office of National Statistics, the price of mushrooms in the shops remained fairly stable, around £10.00 per kg, until the 1980s since when there has been a steady decline to £3.50 per kg we pay today. Prices adjusted using the Bank of England Inflation calculator. The financial incentive to home grow standard mushrooms has much reduced
The reason for the fall in price is that commercial production of button mushrooms (AKA Champignon de Paris) and Portobello Mushrooms has gone from many small growers, often part of a diverse mixed farming enterprise, to industrial scale production. Mega-farms in Poland and Holland dominate the European market.
Industrial Mushroom Farming
In the UK, Northern Ireland was a centre for mushroom production but that has seen consolidation. In 1991 there were 296 mushroom farms but by 2023 that had reduced to just 10. The modern mushroom farm is basically a highly mechanised, industrial process. Combining spawn (seed) from specialist producers with a growing medium from another specialist producer.
The traditional commercial growing systems were very different. Basically scaled up versions of the home growing methods.
Home Growing Mushrooms, Traditional Method.
The growing information is taken from gardening books from 1930s to 1960s.
Up until the 1950s it was said that the only suitable growing medium for mushrooms was based on horse manure. By the mid 50s, some were using clean straw rotted down with specialist chemical mixes.
The ideal horse manure was fresh stable manure from healthy, well-fed horses with a high straw content. Wood shavings were to be avoided. This would be built into a stack or row three feet high and deep. This was covered or cased with one inch of sifted soil and left for a week.
In rainy weather protection such as a tarpaulin was used to prevent the heap cooling too much and nutrients washing away. After a week the stack was rebuilt completely, bringing the outside to the inside and vice versa. If the stack was drying out, which was probable, water was added at this stage.
This process of rebuilding or turning the heap was repeated. Some said three times at weekly intervals but A. G. L. Hellyer recommended every fourth or fifth day for three weeks – four or five times. Finally check for any ammonia smell. If the manure still has any ammonia smell left, turn once more and leave the heap to dissipate the ammonia. Now, the raw material for the beds is ready to be placed.
Conditions and Locations for Growing Mushrooms at Home
The ideal conditions for mushroom growing are darkness and a minimum temperature of 13ºC (55ºF). Some wealthier home growers would have a brick built shed specifically for mushroom growing, but that was rare.

The floor of a house cellar will be kept cleaner if the mushroom bed is made up in a wooden frame made to fit the available space. The sides should be just higher than the soil casing.
- Cellars were often used for mushroom growing due to the absence of light. Quite a lot of work though, transporting the growing medium up and down stairs.
- Mushrooms could be grown in a coldframe with straw covering the bed to exclude light but the most common location was in a greenhouse under the benching. Greenhouses at that time were mainly of the dwarf wall type, giving a solid face to one side and sacking was hung from the front of the benching as a curtain.
- The mushrooms could be grown outside on ridge beds. Home mushroom growing was acknowledged to be a chancy enterprise but outside was even more so.
- Most risky was naturalised outdoor growing. A patch of turf would be raised every yard or so and pieces of span placed. If possible some horse manure would be added. After this it was ‘fingers crossed’
Beds and Boxes
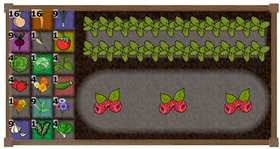
Beds could be set up for mushrooms but most commonly they were grown in boxes. To maximise growing space from a limited area, the boxes could be staggered as in the diagram below.

Mushrooms can be grown in small boxes stacked as show in the diagram. Such small boxes cannot hold much heat so are only suitable for warm sheds or cellars, and to save floor space.
Setting Up the Beds
The rotted manure would be placed in a layer between 8” and 12” deep. It was well trodden to press out any air pockets.
Spawning the Mushroom Beds
The temperature of the manure was taken from deep in the bed and when it was between 21ºC (70ºF) and 24ºC (75ºF) it was ready to be spawned. The spawn was broken up into walnut sized pieces which were buried 1” deep spaced between 9” and 12” apart each way.
Check for the Spawn Running

It was possible to grow mushrooms outside but was acknowledged to be very risky.
After spawning the bed was covered with a 6” layer of clean straw to provide a dark, humid and warm environment. Outdoor beds in cold weather could be covered in up to 12” layers of straw.
After a week has passed, the straw should be lifted and the bed checked for white filaments running through the manure under the surface. This may take up to a fortnight so check daily. Once the the filaments have appeared it is time to case the bed.
Casing the Mushroom Bed
The straw should be lifted and the bed cased with an inch to an inch and a half of heavy, loamy soil. Use the back of a spade to beat down the casing onto the manure. Replace the straw immediately the bed is cased.
Temperature and Humidity
The room temperature should ideally be 15.5ºC (60ºF) and the air kept humid by syringing the floor and walls. If the casing begins to dry out, water lightly using a fine rose and water at around 15ºC Be careful not to soak the casing, just keep it slightly damp.

Mushrooms packed into a trug to take to the kitchen,
After six weeks the mushrooms should start to appear. At this point some remove the straw if the bed can be kept in a temperature of 13ºC (55ºF) Others lift the straw for harvesting and replace it at each pass and cut.
Harvesting
The mushrooms can be snapped off by hand or better sliced across near to the surface near to the surface. Brush off any specks of dirt and pack stalk up in small trugs for transport.