Champion show grower John Trim reveals the secrets of growing trench celery in this second part of a two part article – the first part of Growing Trench Celery covered varieties to grow, sowing and initial cultivation.
Planting out and soil preparation for Celery.
Planting out time in my Southern location is early May once all danger of frost has passed. This date will vary according to your location.
I prefer to grow most of my crop in 30 litre bottomless pots stood on the open ground. This affords the celery better protection against slugs and snails.
Around the top of the pots I smear ‘Vaseline’ which the little pests are reluctant to crawl over. Or try stick on copper tape, which also works well. But which ever you use don’t forget to keep the slug pellets around the plants as a last line of defence.

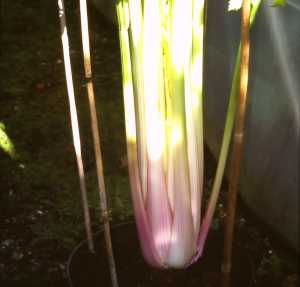
Morning Star Celery growing in a 30 litre pot

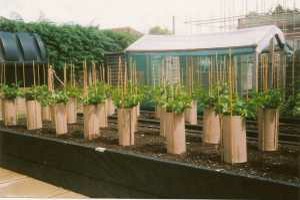
The celery with cardboard carpet inserts around them. A cheap and effective method of gently drawing up the blanched stalks.

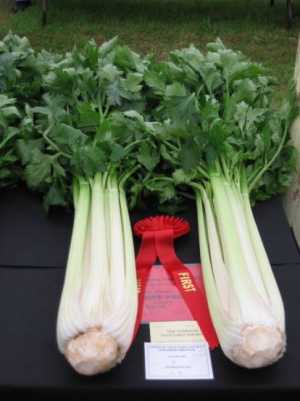
Morning StarCelery at the
NVS Southern Branch Championship Show. Held at the New Forest Park Showground. Hampshire.
The pots are filled with a 50/50 mix of sieved sterilised top soil and Levington M3 enriched with a few handfuls of concentrated manure like ‘Dug’ or ‘6X’.
If growing in the open dig a trench 12” deep, fill with well rotted manure and top off with 6” of top soil. Rake in 4oz of fish, blood and bone per square yard 3 weeks before planting out.
An alternative method is to grow in a raised bed. This makes plant management easier but pay special attention to watering as raised beds can dry out very quickly.
After two weeks in the bed remove the cardboard tubes and replace with 12” corrugated cardboard with the groves on the inside. This helps to keep the stalks growing straight.
Place 4 bamboo canes around each plant to support the foliage. Use a soft material like old tights to tie the canes together.
Spraying Celery Against Celery Leaf Miner.
The plants are sprayed every week with an insecticide to deter celery leaf miner. If any tunnelled leaves are found they should be nipped of and destroyed.
In mid June place another sleeve of corrugated cardboard over the first. These are held in place with Velcro ties. The outside sleeve is moved up an inch a week, always just above where the stalks divide into foliage.
All the time maintain a loose fit. At this stage we are drawing the stalks not attempting to blanch them.
Aim for around 18”/19” of blanch 4 weeks before the show. Then is the time to pull the ties tight around the collars to exclude the light and turn those stalks from green to white with a lovely pink flush.
Continue to examine the celery every few days on the run up to the show. Remove any sides shoots with a sharp knife and any split stalks that you find.
Also change the feed to a soluble high potash (Chempak No8) or a tomato fertiliser applied once a week up to harvest. This will help to condition the celery and improve the colour.
Harvesting Exhibition Celery
When harvesting check the centre of each plant for any sign of heart rot as this would make the celery unshowable. Also look for blisters inside the stalks which will lose you marks and a visible seed head will take you right out of contention.
Each specimen should be clean, well blanched, free from pest and disease damage with dark green turgid foliage. Avoid plants with split stalks or a split root plate.
Condition is paramount because this carries the maximum points (6). Uniformity and shape carry the next highest points (4) for each, so the celery should be well matched. The celery should resemble a column which is the same size at the base as it is at the top of the blanch. Judges don’t like skinny tapering celery.
Harvest the celery leaving as much root on as you can cope with. Enclose the root ball in a plastic bag and fill with water. Protect the blanched stems with new corrugated cardboard. If you have a long journey to the show it may be necessary to top up the plastic bags with more water on the way. I guarantee the celery will drink it up.
Staging Celery for Show
Celery is a hard vegetable to grow to perfection but they are worth the challenge.
This is the second part of a two part article. The first part is Growing Trench Celery


