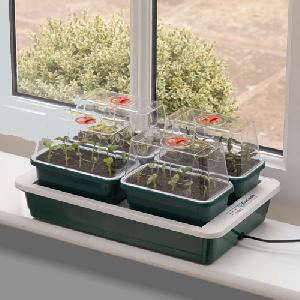
Six quick tips for you to help with propagating from my own experience.
Propagating Tips
- Chitting Potatoes – Seaweed Spray
- Make Your Own Hormone Rooting Compound
- Free Tomato Plants from Sideshoots
- Handle Seedlings Correctly
- Move Tomatoes on Promptly
- Transplanting Tomatoes, Plant Deeply
- Add Lime to Compost for Brassicas
Chitting Potatoes – Seaweed Spray
When chitting potatoes, give them a light mist-spray of foliar seaweed feed every couple of weeks. Don’t over-do it, you don’t want liquid dripping off the tubers, just slightly damp. I’m not sure how it does it but it seems to help keep the tubers developing strong shoots which improves the eventual results with fewer failures on planting out.
Make Your Own Hormone Rooting Compound
Make your own hormone rooting solution. Take a young willow branch, cut into small pieces (about 1” or 2.5cm long). Place in a bowl and pour boiling water over to cover. Leave for 24 hours and then strain off into a bottle where it will keep for up to a month. Water on to the compost when propagating from cuttings.
Free Tomato Plants from Sideshoots
Free Tomato Plants – As your tomato plants grow, allow some of the sideshoots to develop until they’re between 15 and 30 cm long. Rip them off the plant and pot deeply into very moist, almost wet compost. Use a plastic bag over the shoot tied to the pot to stop them drying out and they should root in a matter of days, giving you more free tomato plants
See also this video: Free New Tomato Plants from Sideshoots
Handle Seedlings Correctly
When transplanting always handle seedlings by the leaves, not the stem. A damaged leaf or even a missing seed leaf isn’t a problem but a damaged stem means the plant is doomed.
Move Tomatoes on Promptly
When growing tomatoes from seed move into separate pots from the seed tray within 6 days of germination. It’s been shown in experiments that the eventual plants do better than plants from seedlings left crowded beyond 6 days.
Transplanting Tomatoes, Plant Deeply
Add Lime to Compost for Brassicas
The bonus tip! If sowing or transplanting brassicas using multi-purpose compost, add a little extra garden lime to the compost. I just put a 7.5cm layer of compost in my potting tray and dust with enough lime to whiten it, like dusting a cake, prior to mixing it. Wear gloves as lime stings in little cuts. Brassicas like a high pH (low acidity) and the lime will increase the pH of the compost.
We’re always happy to get comments, tips and even full articles for the site from gardeners: just contact me or pop your tip in on the comments box below.


All very handy tips thanks.
I mix a scoop of lime into the surrounding soil when planting out brassicas. Never thought to mix it with the potting compost. Thanks for the tip. I’ll try it with this years batch.
Regarding “moving on tomatoes promptly”, we are usually told to transplant at the first true leaf stage. Are you saying that there is no need to wait that long? My toms are in a propagator, slightly leggy and as yet, no true leaves showing. I shall repot them today and let you know what happens.
Hi Eric – if they are in individual pots or modules then it doesn’t apply. If you’ve sown, as I do, a number of seeds in a tray or pot then moving them into individual pots should improve eventual performance. Obviously be very gentle with youngsters!
I don’t mind leggy seedlings as I plant on deep to encourage root development.
Hi John
I am trying to germinate seeds saved from last couple of years but not being successful. Seeds are sunflower, parsley, cosmos, marigold and various other flower seeds.
Thanks for help
Hi John
Your tomato tip contradicts the info on my packet of F1 Shirley seeds which says move on after 4 leaves form which is a bit longer than 6 days.
Hi Trevor – It’s a seed packet, not a golden tablet sent down from above! 🙂
Seriously, seed packets just follow accepted standard practice which works for most people. Doesn’t mean it’s the best you can do.
But, in the end, just do what you feel comfortable with.
Have you tried propagating slips from sweet potatoes? Here in France the grow well in my polytunnel but the individual plants cost a lot. I have tried all the tips from the web but, so far, without success
I’ve not grown sweet potatoes – planning on giving them a go this year though.
with sweet potatoes you need to wash the tubers throughly as they’ve been sprayed usually with fungicides etc -unless labelled as organic – these inhibit growth. once washed they should chit like potatoes -keep in propagator or use plastic bags as John suggests, above -not as wet, though, but warmish.
I have grown sweet potato slips for the first time this year with brilliant success. Having tried 3 different ways using 4 tuber in each trial. I found the best way for me was to lay the tuber in a tray & cover with a good grade compost & water well. ( I only use rain water for all seed sowing/propagating) When the slips grew to about 100mm/150mm I removed from the tuber & placed in water where they grew roots. When happy with the rooting I potted them into good compost to grow ready for planting out. The tubers where organic purchased from Waitrose.
I have grown sweet potato slips quite successfully last year. The plants were in the open. Prolific foliage but very little fruit forming. Happy nevertheless because I picked the vine tips as veg something similar to asian spinach.
How large are the shoots supposed to be on pots that I’m ‘ chitting’ before I can plant them? I’ve had two lots of Pentland Javelin – majority of first lot went wet and oozed and so thrown away. Then changed my supplier so second lot are fine except for seeming to take ages to show decent sized shoots!
My second earlies are doing much better than the first too!!
Just back to gardening after many years of absence!!
It doesn’t really matter – once in the ground they’ll get away.
Hello John, I find a good tip for sowing early seeds in the propagator is to use warm or hand hot water when watering after sowing. I found this tip in a gardening book by Harry Dodson, it seems to work very well and the old time gardeners used it.
If I knew half as much as Harry Dodson about growing, I’d be twice as knowledgeable! I always keep a can of water in the potting shed to warm up and a water butt in the greenhouse.
I’ve grown sweet potato plants successfully in the UK. Start Jan/Feb. Stand an organic sweet potato in water on a warm sunny window sill. After a month or two roots will form. (If the water gets low top it up, if it gets algea change it). After a few weeks shoots will appear. When the shoots are a few inches tall nip them off and stand them in water. I use a glass jar. Soon roots will appear. When the roots are extensive pot them up. I started at Christmas time this year and now have more than a dozen plants in pots, some quite big.
Hi,
For watering seeds and seedlings in my propagator I have a small bottle of water in the propagator to warm it, thinking warm water is taken on easier than shocking the little things with cold water.
Bryan
Thank you for sharing great tips! I love this blog post.
I have to use the same space (window of heated and insulated Worksop) for both potato chitting and seed propagation. I have turned the heating off as I understand chitting should not go over 10*C. I guess the only way to have warmth (20 -25*C) for my seed propagation without cooking my spuds is with a heat mat?
Or a propagator – preferably thermostatically controlled.
Hi
With me beening in my first year of growing all of this tips are great
This might sound a bit strange but when I’m sowing seeds in my prop at home I heat the damp sowing compost in my oven on a old tray then spray them with warm water from the kettle as soon as there appear I take them of the heat and transfer them to my greenhouse,no heat but there are covered,and there are doing great
I found that a good watering tip for young seedlings is to make small holes in the lid of a plastic milk carton, and then fill with water as so many watering cans can drown young seedlings.
Given the price of some F1 tomato seeds these days (March 2023) I “pre-germinate“ as many seeds as I need plants in small plastic containers, which originally contained business cards, on damp kitchen roll tissue.
If the lid is kept on and the seeds are placed in a warm spot or propagator they will germinate in a couple of days and you’ll see the new rootlets just beginning to emerge.
At that point I use a pencil and very gently lifting the seeds out into individual pots.
you save not only compost but also expensive seeds.
Any seeds that are not used can be resealed and stored in a cool dark place and I have found them to be viable for up to 5 or six years at least.
Thank you for the reminder about lime. I’m determined to be successful with sprouts this year. I’ve always done well with cabbages and kale though – so many mysteries.
Thanks for all the tips, everyone! For getting extra tomatoes, I take the side shoot and stick it in water for a few days. It usually (always!) sends out roots very quickly and can be repotted. I find this less bothersome than covering with a plastic bag etc.
Morning John,
I have been given a grow light which when on gives a very vivid purpld light. My question is how high from the seedlings should it be. Mines about 6″ and I’ve noticed when potting up, very little root but leggy seedlings. I’m a veg man not really a flower grower by the way. The light is on about twelve hours a day…HELP!
Alfred John Brookes-Wiggitt
It’s quite a complex subject and depends on how much light is being emitted, what frequencies etc. I prefer a white light from a T5 fluorescent myself as supplementary lighting that also heats the propagator to some degree.