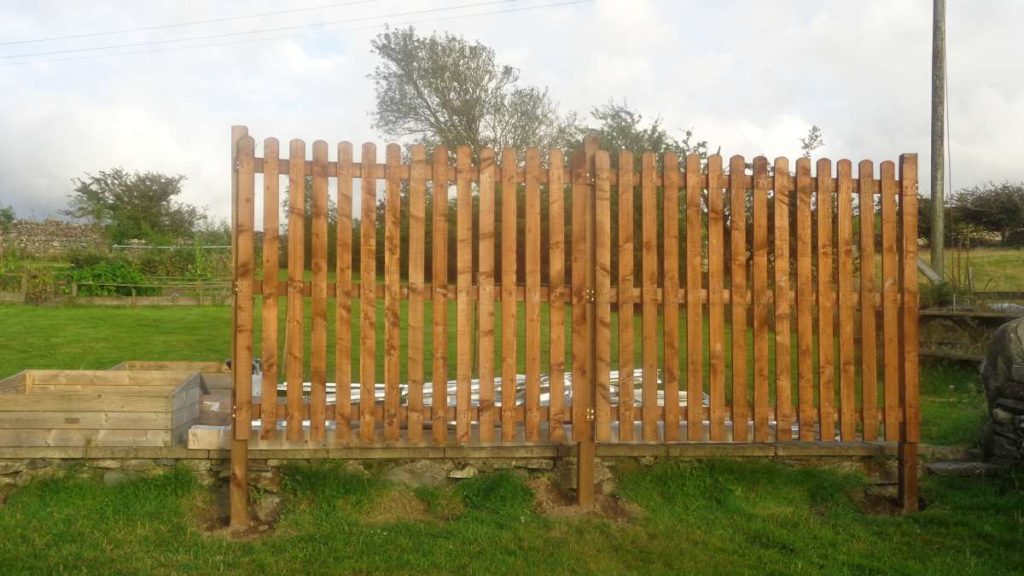
The windbreak fencing is now up so I can build the greenhouse without fear of it blowing down.. again.

Wind and light can pass through the palisade fence but the force of the wind should be halved at least
I haven’t made a start on building the replacement Eden greenhouse yet. I know they reckoned the bar capping would enable it to withstand our storms but I’m not so sure. So I’ve put a 5 foot palisade fence up on the very exposed seaward side and a 3 foot windbreak netting fence on the opposite.
Unlike a solid fence, a palisade fence with gaps won’t completely block the wind but it will reduce the force without causing destructive eddies. I could have used windbreak netting but the wood looks better and this is very visible to the front. I don’t want to put an eyesore up!
Building the Wooden Fence
It’s a fair old job. The posts are 8 foot 3” square tanalised. The 5 foot palisade fencing was, I think, just painted with preservative. Before using them they all got three good coats of Cuprinol.
We then dug holes 2 feet deep. In the bottom of the holes I put a layer about an inch thick of pea gravel to stop water pooling in the hole and rotting the posts. Around the poles a mix of stones and rocks before adding a bag of postcrete (very fast setting ready mixed cement) to each hole.
I’d some old bags of post cement mix which won’t be as solid (it only has a shelf life of 3 months) but still useful so this was added when the first layer had set. Then topped up with with soil. The panels were screw fixed onto the poles. The base of the panels is level with the greenhouse base. This is about a foot above the sloping land level on that side.
The netting windbreak fence

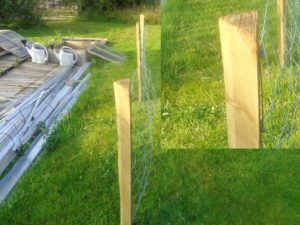
Windbreak fence to rear prior to putting the scaffold netting on. Inset shows the quarter post with its flat faces which make fixing easier.
The other side isn’t so visible, so much cheaper windbreak netting will do. Being as the land slopes up from the greenhouse, the top of the netting will be at roughly the same hight as the wooden fence anyway. This just involved using my 5 foot iron bar to open a hole and then knocking in the 4’6” quarter poles leaving 3 feet above ground. Next staple pig wire netting to the flat edge of the poles to support the shade netting.
Light & shade
It will cause a small reduction in light in the greenhouse because of shading. It may balance out by keeping it warmer, slowing and diverting the winds. Wind chill is significant. In theory we have a very long growing season here but the wind chill means it isn’t anywhere as long in practice.
Cost
Total cost would probably be around £180.00 but I’d got the Cuprinol, pig netting and staples etc. in stock. Still, far less than the cost of a greenhouse replacement!


Leave a Comment Here on The Great Wooden Wall of Wales!