What are Microgreens
You may well be familiar with microgreens. These are basically seedlings typically harvested when they’ve made a little growth. A step beyond sprouted seeds but below mature plants. Usually microgreens are harvested shortly after the seedling has fully developed its seed leaves – technically called cotyledons – but some plants like peas are allowed to grow a little further.

Bowl of Microgreens
They’re popular with chefs as a garnish or an addition to a salad. They can have a surprisingly intense flavour and are usually quite sweet due to the high levels of sugars in the seedlings.
Nutritional Value of Microgreens
There are some extravagant claims around that microgreens are 40 or even 60 times better for you than eating the mature plant but little in the way of validated analysis results. Those results available do show higher nutritional value for microgreens but more in the range of half as much again or double the value of the mature plants.
In any case microgreens are expensive to produce commercially so the amount actually eaten tends to be a small part of our diet.
Commercial Microgreen Growing

Curtis Stone AKA the Urban Farmer on Youtube growing microgreens in his greenhouse
Microgreens are a popular crop for urban city farmers, they’re ideal for city growers. They’re also ideal for people starting a new enterprise as the capital investment required to start a microgreen farm is very low and learning how to grow microgreens can be achieved before scaling up to commercial production.
Microgreens are a premium product attracting high prices and offering a good profit opportunity. They do not have a long shelf life and don’t travel well so being close to market is a big advantage. Microgreens require very little space to grow and are often grown under cover and under lights so it is easy to find premises to grow them in.
Microgreen Seeds
You can buy special kits and special seeds to produce micro-greens at home but they’re not necessary. In fact you don’t even need to buy new seeds. Microgreens can be a good use of surplus seeds. Some brassica seed is extremely cheap and you might have hundreds of seeds in a packet. Even at just 50% germination that’s an awful lot of potential cabbages for a family.
There are many different seeds you can use for micro-greens.
Seeds for Microgreens
- Leafy brassicas – cabbage, broccoli, cauliflower, Brussels sprouts, kale, Pak Choi
- Beans – French, runner and broad beans
- Peas
- Carrot
- Amaranth
- Beets – bulls blood is commercially popular because of the seedling colour
- Leaf beet – chards
- Spinach
- Lettuce and salad leaf plants like rocket
- Mustard – Komatsuna (mustard spinach), Mizuna, Mibuna etc. all work well.
- Radish
- Turnips & Kohlrabi
- Leeks
- Sunflowers
- Herbs – Anise Hyssop, Basil, Borage, Korean Mint (Agastache), Lemon Balm, Purslane, Sorrel, Coriander (Cilantro), Fenugreek, Dill and Fennel are all suitable.
Mixing Microgreen Seeds
You can mix microgreen seeds and sow at the same time but since different seeds take different times to germinate and grow to harvest stage you’re best to stick to sowing similar types in a mix. For example, you could mix cabbage, kale, and cauliflower seeds in a mix but it wouldn’t be sensible to sow peas or sunflower seeds in the same mix. A good rule of thumb is to sow similar sized seeds at the same time.
Buying Microgreen Seed
If you’re buying in seeds for microgreens there are specialist suppliers like CN Seeds but they’re aimed at commercial growers. I think their minimum order is £50. You do need far more seeds for growing microgreens than growing full plants so using normal packets would become quite expensive.
Buying seeds for sprouting or eating can be an economical option. Dried beans, peas etc. will often germinate and grow perfectly well. If you want to check before going to the trouble of sowing, try a seed germination test before going ahead
Equipment for Producing Microgreens
You don’t need any special equipment for growing microgreens beyond what a gardener is going to have anyway. Those of a certain age may well remember growing mustard and cress on blotting paper in a saucer at school – those were microgreens. Blotting paper – that dates me!
You will need seed trays, preferably both trays with holes in the base and solid trays. A hand sprayer or a watering can with a fine rose but you can get away with an indoor watering can.
A warm place which could be a heated propagator or a windowsill in the house.
Commercial microgreen growers will use grow-lights to finish off the process but home-growers can use a bright windowsill outside of the darkest period of the year around the winter solstice (21st December)
Compost for Producing Microgreens

Tamping down the compost. A little too much perlite in the mix.
Most of the energy that fuels the initial growth of the plant comes from the seed itself so you don’t need a compost with a high level of nutrients.
It does need to be sterile for consistent good results. Home-made compost, unless sterilised, will have viable weed seeds and more importantly for microgreens fungal spores in it. Fungus and mould can be a problem with microgreens.
It also needs to be light and porous. You don’t want a compost that holds water so much as one that drains well. A sieved (just use a garden riddle) multi-purpose compost mixed with perlite (1 part perlite to 5 parts compost) is good and cheap. Seed composts would possibly be better but more expensive – a lot depends on what you have and how much you are growing.
Sowing Microgreens
Hygiene

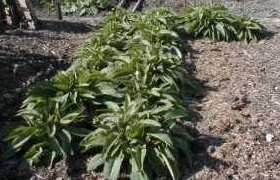
Mustard Microgreens – Thickly Sown
Seedlings are always vulnerable to disease, particularly fungal disease, so hygiene is important when sowing in trays and pots. Because of the density of seeds, it is more important with microgreens to avoid fungus. Having said that, it has not been a problem in my experience.
Sterilise Seed Trays
Wash off the seed trays and then sterilise them by dunking in water for 5 minutes to which a little bleach has been added. Add the bleach at 150 ml per 45 litres of water or half a cup full per 10 gallons. An old bin or a trug is ideal. Add the trays one at a time so the solution gets all over the trays. Alternatives to bleach are Jeyes Fluid or Armillatox. Rinse off well and dry.
Filling the Seed Trays
Fill the seed trays with the compost mix and then tamp firm. I just use a block made from an offcut of 3 x 4 wood. You don’t want rock-solid, just firm.
Initial Watering
This requires some judgement. You can sit the tray in water for 10 minutes and then drain on a gravel tray for a few minutes but it takes time, or just water sparingly using a fine rose on the can. However you do it, you want the compost damp but definitely not soaking wet.

Various Microgreens 5 Days After Sowing
Sowing the seeds
You want to sow the seeds far more thickly than normal. A good rule of thumb is to space the seeds with a space equal to the seed’s size between them. In practice this will depend on how many seeds you have available. Try to sow as evenly as possible covering the whole surface.
If you’ve got seeds left over from the year before, consider mixing the seeds (of similar types) – say half a pack of cabbages, half of cauliflower for example. If you’ve not many seeds then sow half a tray.
Soaking Seeds
With large seeds – peas, beans, sunflower etc., pre-soaking the seeds overnight in water at room temperature will greatly improve germination rates and consistency.
To prevent disease some commercial growers soak the seeds in water which has had food grade hydrogen peroxide added. A bit of overkill for home growing though. A more organic method would be to add a teaspoon of cinnamon to the water. Cinnamon is a natural fungicide.
Press the Seeds
For good germination it helps if the seeds are in good contact with the compost rather than just sitting on the surface. Pressing them down so they make good contact but not burying them, helps germination.
Covering the seeds
You don’t want to cover the seeds as you normally would. A very light covering is ideal for smaller seeds. Vermiculite is great or finely sieved seed compost. More a dusting than a covering. With larger seeds no covering at all is recommended.
Lightly water
With the smaller seed a very light watering using a spray mister can be useful. The purpose is mainly just to settle the covering on the seeds.
Growing Microgreens
Germinating Microgreens

Microgreens Growing in Propagator – 16 Days After Sowing
You can treat your microgreens just like ordinary seeds and cover the seed tray with a propagator lid but many commercial growers find they get better germination by stacking the trays so the seeds are pressed down. The top tray may not have seeds in but is filled with compost. One commercial grower actually places a piece of concrete slab in the top tray!
Temperature is important to germination, ideal temperatures for germination vary according to what is being grown but a good compromise is to provide bottom heat between 15ºC and 20ºC
Check daily or even twice daily after the second day. Mist or lightly water if required. Once most of the seeds have germinated, remove from the stack. This is often as early as the third day but can take a week.
Once out of the stack the leaves on the seedlings will be yellow but they will green up very quickly. Usually they green up in 24 hours or less.
Winter Growing Microgreens
Growing microgreens in winter is more difficult than summer. Warmth is easy enough to provide, you can grow them indoors where it is warm. However, once germinated the seedlings need light.
Between the end of October and the beginning of March when the days are short they will need additional light to grow well. Growlights are relatively inexpensive and cheap to run, especially on a small scale. There’s more information of day length and its effect on growing on the site,
Summer Growing Microgreens
Growing microgreens in the summer is easy and they can be grown outdoors. Don’t forget the seedling stage is attractive to pests like slugs and snails. Even outside of winter in the British climate they’ll most likely benefit from the warmth of a heated propagator but it is not necessary.
Failure to Germinate & Other Problems with Microgreens
Seeds failing to germinate is unusual but the cause is most often one of three things:
- Not enough moisture is the most common cause of failed germination.
- Incorrect temperature. Seed germination rates fall quite sharply outside of the optimum seed germination temperatures.
- Poor seeds. Seed germination rates fall with age and poor storage of seeds. Damp conditions and high temperatures will all kill off seeds.
Damping off is a problem caused by fungal growth. If you spot any fungus growing, pull out the seedlings and soil around the spot. Increase ventilation and pay attention to hygiene if re-using the trays.
Harvesting Microgreens

Microgreens Ready to Harvest
Harvesting your microgreens is simple and easy. Just cut the seedlings off above soil level with a pair of sharp scissors. If you don’t use an entire tray in one go, just cut what you need and leave the rest to grow on. Commercial growers wash the leaves but personally I don’t
Used Microgreen Compost
Once you have harvested, the used microgreen compost can just be added to the garden soil or compost heap.
Using Your Microgreens
Microgreens can make a great addition to a salad or even a salad on their own. They make an attractive edible garnish for meals. Microgreens can be used to add interest to a sandwich. Egg & cress is a good example of a sandwich using microgreens.